Table of Content
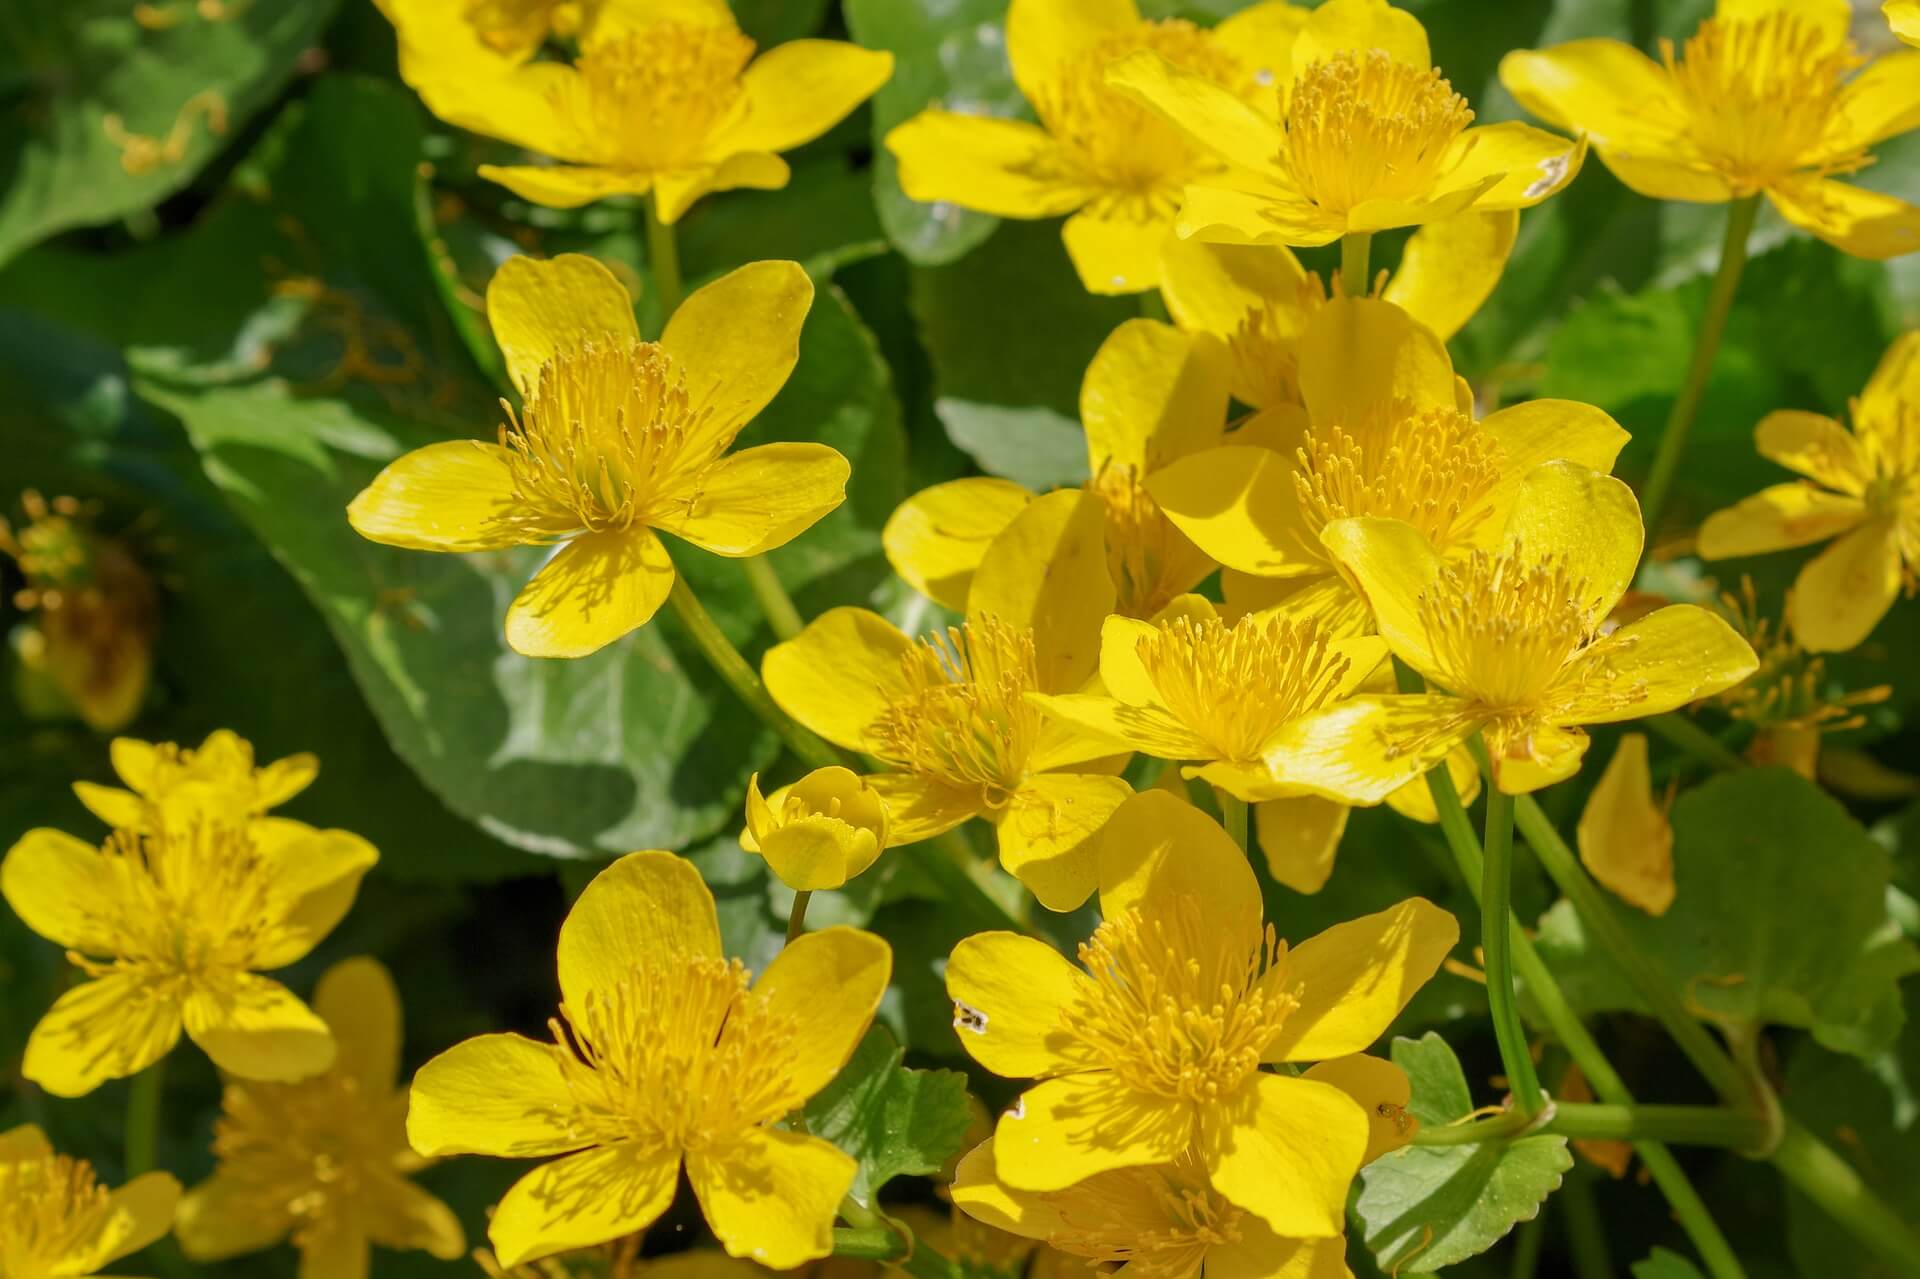
Buttercups are known and loved for their alluring flowers that come in plenty of colors. These flowers have a unique ability to collect solar energy with their petals and then mirror a bright yellow reflection from their pollen-filled cores. This is what attracts various pollinators to the flowers.
If you’re looking for a flowering plant that can entice bees and butterflies into your garden with their blooms, then the buttercup is the perfect pick for you. Here’s what you need to know about growing your very own buttercups in your garden.
What are Buttercups?
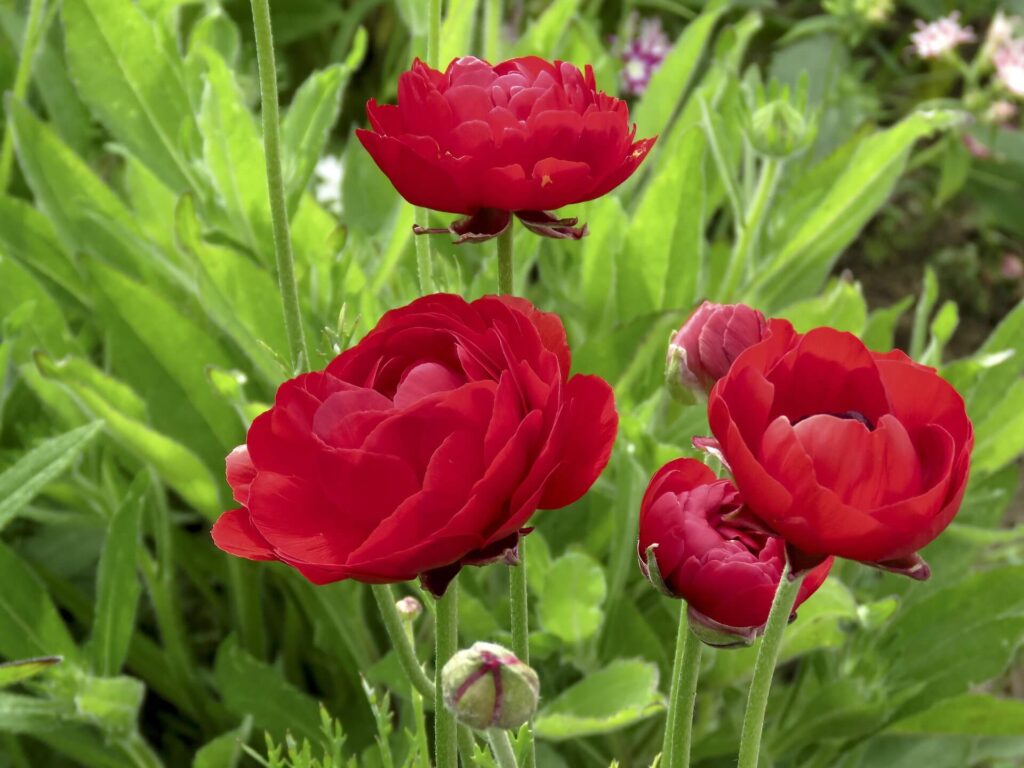
Buttercups, (“Ranunculus”), are a widely diverse species that consists of around 600 varieties. While most of them are perennials, some can be grown as annuals or biennials as well. Naturally, buttercups only produce flowers in shades of yellow. However, over time, many other new colors have been introduced through breeding and hybridization. Some of these colors include white, red, orange, pink, and purple.
Most species of buttercups are toxic to humans and animals when consumed. However, some varieties are used in traditional Asian medicine to treat fever, redness of skin, and rheumatism.
Types of Buttercups
1. Meadow Buttercups (Ranunculus acris)
This is the most common type of buttercups you can find in parks, grasslands, and gardens around you. These plants grow up to a height of around 1 M (3 feet) and produce flowers mostly from April to October.
2. Bulbous Buttercups (Ranunculus bulbosus)
Bulbous buttercups were named so due to their thick, bulb-like roots that go deep in the ground. These roots have the ability to survive through the winter and start to grow back in the spring after the frost has passed.
3. Creeping Buttercups (Ranunculus repens)
Creeping buttercups are resilient weeds, which means they need very little care and maintenance. They can even tolerate being stomped on which makes them perfect to grow on pathways as ground covers.
4. Hairy Buttercups (Ranunculus sardous)
These plants have furry stems full of minuscule hairs and are mostly found in wet or wastelands. They also have swollen fibrous roots that are similar to bulbous buttercups but a little bit less obvious in size.
5. Goldilocks Buttercups (Ranunculus auricomis)
Also known as “Wood Crowfoot” or “Greenland Buttercups”, these plants generate flowers with imperfect petals that differ in size and shape from each other. They’re small plants that prefer to thrive in sheltered and cool spots.
6. Water Buttercups (Ranunculus lingua)
Commonly called “Greater Spearwort”, these buttercups grow in water and have big flowers which are known to be the largest in their plant family. They have a tall, upright growth and are great for ponds in your garden.
7. Lesser Spearwort (Ranunculus flammula)
Lesser spearworts can be found in wet places that are close to rivers, lakes and ponds and as well as in freshwater meadows and marshes. These plants reach up to a height around 30 cm (12 inches) and they bloom from June to October.
Planting Buttercups
The right time to start your buttercup cultivation differs based on the USDA zone your region belongs to. For instance, from zone 4 to 7 these plants are grown as annuals so for a summer blooming experience they need to be planted in the spring. On the other hand in zones 8 to 11 they’re planted in the fall as winter hardy perennials which produce flowers in the spring.
Most of the time buttercup plants don’t generate any blooms within the first year of planting. However, they have a long lifespan in comparison to many other similar flower plants which go over 10 years. Once these plants have started flowering, you’ll be able to see your buttercup blooms at least for 6 weeks annually and they’ll continue doing so for the rest of their remaining years.
How to Plant Buttercups
Buttercups can be grown from both seeds and division of tubers but many chose the latter method as the former takes a bit more effort and time.
Seed Propagation
- First, sow the seeds in sterilized trays or containers and cover them with a very thin layer of soil.
- Cover the containers or trays with clear polythene or plastic to increase the humidity.
- Keep the trays in a refrigerator for at least 3 weeks continuously.
- Remember to water the seeds lightly and frequently during these three weeks to keep them moist.
- Once the 3 weeks have passed, take the containers out and remove the polythene cover.
- Then cover the trays again with clear glass material and place them in a shaded spot.
- Seedlings will take 2 weeks to three months to appear depending on the specific species and growing environment.
- After the young plants get well-established and strong enough, you can simply transplant them into pre-prepared beds or pots.
Division of Tubers
- First, soak the tubers in warm water for at least one hour before planting them.
- While the tubers are in the water, dig holes leaving at least 12 inches (30 cm) between each hole.
- The holes should be about 2 inches (5 cm) deep and the width needs to be decided according to the size of each tuber.
- After the soaking and digging are finished, place the tubers in the holes so that the sides with the roots are facing downward.
- Cover the holes with soil and press down firmly.
- Water well.
How to Maintain Your Buttercups
Here’s what to know when it comes to maintaining your buttercup plants:
Sunlight
Buttercups need at least 6 hours of full sun per day, but they can also tolerate partial shade. When growing these plants indoors, place them somewhere that gets direct sunlight throughout the day such as a balcony or a windowsill.
Temperature
Though buttercups are sun-loving plants, they can go dormant during the hottest time in summer, when temperatures go over 90 Fahrenheit (32 C). However, temperatures that drop below 28 Fahrenheit (-2 C) can also harm them easily. They have different day and night heat preferences. The ideal daytime temperature is around 60 Fahrenheit while 45-50 Fahrenheit (7-10 C) degrees is perfect during the night.
Soil
The preferred soil types of these plants can be varied according to the species and cultivator. For example, bulbous buttercups grow well in light chalky, and sandy soils while creeping varieties love damp and heavy soils. However, similar to other weeds, buttercups generally flourish in poor to mildly nutrient soil types that have good drainage.
Watering
Buttercups need at least an inch of water weekly, especially in the blooming season. Water these plants whenever the soil surface is dry and hard to the touch. Using a soaker hose, water the roots and avoid spraying the foliage with water as this can cause it to rot.
You may have to increase the amount of water in extreme drought conditions, but in areas with heavy rainfall levels, it’s likely you won’t need to water them at all.
Fertilizing and Mulching
These plants have to be fertilized at the beginning of the blooming season which can be either spring or summer. Use an all-purpose general fertilizer monthly within the said time period to feed these plants.
Buttercups do well when the roots are surrounded with different types of organic mulch such as coco hulls, bark, and straw. A layer of mulch can help in retaining the moisture and maintaining better drainage of the soil.
Deadheading
Deadheading is the process of removing old and wilted flowers to stimulate and encourage flowering in the blooming season. Use your fingers to pluck the dried-up blossoms or cut them right below the flower heads using a sharp knife or a pair of scissors.
Pests and Disease Controlling
While common garden pests like aphids, mites, and leaf miners can harm your buttercups, you’ll also need to watch out for birds. Birds love to munch on the shoots of young plants. To avoid your plants getting infested, use a fitting pesticide or insecticide. Cover the plants with bird netting to protect them from the birds.
Bird netting can be found in online or garden centers for you to buy for an affordable price. Birds only eat young and fresh shoots so when the plants have reached about 4 inches tall, you can remove the bird netting.
Diseases and fungal infections such as root rot, powdery mildew, and rust also pose a threat to buttercups. Poor and extreme growing conditions like lack of air circulation, waterlogged soil, and wet foliage mainly cause such infections and diseases. If your plants are affected by such diseases, remove the sick ones from the healthy ones immediately to control the spread. Spray the healthy plants with a fungicide to prevent a relapse.
Wrapping Up
Buttercups are easy and cost-effective plants to grow in your garden. They don’t demand heavy labor or a lot of attention to thrive and you’ll only need basic gardening knowledge. If you’d like to try something fun and satisfying, growing these beautiful plants will be an interesting and rewarding experience.